Showing posts with label How To. Show all posts

Saturday, 21 September 2019

How To Do Factory Reset In iPhone

Is your old iPhone or iPad using up precious space? Need some extra money? Or thinking of giving it to a friend or family member? Then you'll want to factory reset your iPhone (or iPad) before doing anything with it.

For the uninitiated, a factory reset turns back time to when the device was released from, well, the factory - wiping all account info, apps, media, and everything else you can think of.
This is different to a "soft reset" which should be used when your phone is unresponsive and doesn't remove any data. Needless to say, it's not something that should be done lightly - but if you're sure it's what you want to do then read on.
  • Tap Settings > General > Reset
  • Tap 'Erase all content and settings'
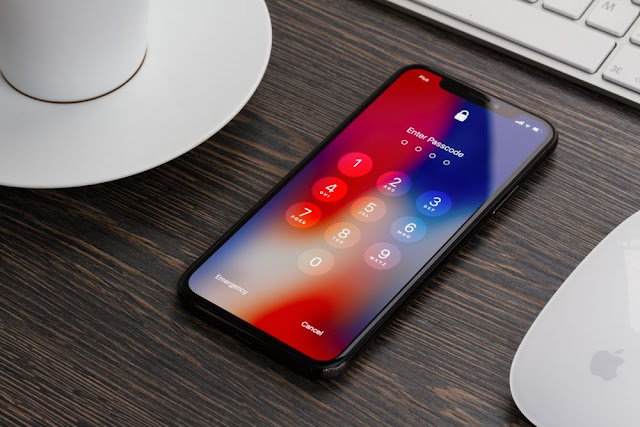
  • Enter passcode/Face ID/fingerprint
  • Tap 'Erase iPhone/iPad'
  • Enter Apple ID password
  • Your iPhone/iPad will now factory reset

Back up your iPhone first

Just in case you change your mind, you'll want to keep all of that data stored somewhere - you can also use it as the basis for your next iPhone or iPad by restoring from that backup.

If you're logged into iCloud, you can begin backing up to it by going to Settings, tapping your name at the top of the page. The select iCloud, and scroll down to iCloud Backup, then hit "Back Up Now".

You can also back your device up to a PC or Mac. Just plug it into the computer and click the small device icon in iTunes. There you'll find an option to set up automatic backups or simply back up with the click of a button. This is also where you'll restore from a backup on a fresh phone.

How to factory reset an iPhone

Here we are then, time to factory reset your iPhone or iPad. The process for both is the same, and it's fairly simple.
Step 1
Head over to Settings, and tap General then Reset. 
This will give plenty of reset options, but the one you need to factory rest your iPhone is "Erase All Content And Settings".
Step 2
If your device uses a passcode, TouchID or FaceID, you'll likely need to confirm this action and then hit Erase iPhone.

Step 3 
You'll next need to login with your Apple ID to ensure it can be removed from the device and that Find My iPhone can be disabled.
WARNING - ALL DATA WILL BE DELETED FROM YOUR IPHONE OR IPAD. Make sure you have backed up any data you wish to keep to iCloud or your computer.
Step 4 
Once you've done this, your phone will take a few minutes before prompting you to set it up as a new device.
Congratulations, you have successfully managed to factory reset your iPhone.

Thank you for visiting my blog. Please do share a comment below.

How To Record Your Screen Activity On Windows, macOS, iOS or Android

Hello Guys,There are lots of reasons to record your screen: you might be making a Let's Play video for YouTube, composing a software tutorial, or preparing a presentation for work.
You might start by reaching for a free screen recorder, and there are some excellent options around, but you might not realise that Windows already has its own build-in recording tool, hidden away in the pre-installed Xbox app.
You can also record your screen from within a browser window, without downloading and installing a large program. It all depends on what you're recording, the hardware you're using, and how much time is at your disposal.

Record your screen on a Windows PC

It’s well hidden, but Windows 10 has its own built-in screen recorder, intended for recording games. To find it, open the pre-installed Xbox app (type Xbox into the search box to find it) then tap [Windows]+[G] on your keyboard and click ‘Yes, this is a game’. 
Click ‘Start recording’ or tap [Windows]+[Alt]+[R] to start, then use the same shortcut when you've finished. Recorded videos will be saved in your Videos/Capture folder in MP4 format.
To customize the recorder's settings, log into the Xbox app and access the Game DVR options. You can't choose a different destination folder for recordings, but you can pick a quality setting, decide whether or not to record audio, and set a maximum clip length.
Unfortunately not all Windows 10 devices can record footage with the Game Bar. To use it, you’ll need a video card supporting one of the following encoders:
  • Intel Quick Sync H.260
  • Nvidia NVENC
  • AMD VCE
If your PC or laptop doesn’t qualify, take a look at our pick of the best free screen recorders for more options.

Record your screen on a Mac

Recording the screen of a Mac is much easier than a WIndows PC. If you're using macOS Mojave, just hit the keyboard shortcut Shift+⌘+5 and all the controls for capturing video and still images from your desktop will appear. You can record the whole screen, a section, or a specific window, then trim, save or share the resulting footage.
If you're using an older version of macOS, you can record the screen using Quicktime Player. Just open the app (which is installed by default)

Record your screen on Android


When it's released, Android Q will include its own screen recorder. If you've installed the Android Q beta, you can give it a try by opening the 'Settings' menu and selecting 'About phone'. Tap the version number seven times, then enter your unlock credentials when prompted. This will put the phone in developer mode, letting you test features that aren't yet fully finished.
Return to the system settings, tap 'Developer options' and select 'Feature flags'. Find the flag 'settings_screenrecord_long_press' and toggle the switch to acitvate it. You can now record your screen any time by hitting the power button to bring up the power options menu, then holding the screenshot button until the screen recording options appear.
If you're not using Android Q, you'll need a third-party screen recorder from the Google Play Store. Such apps are very popular, so there's no shortage of shoddily made or outright malicious ones available. 
If you want to record gameplay footage, Google Play Games has a built-in screen recorder that will start capturing footage automatically when you launch a game. For anything else, we recommend AZ Screen Recorder. It's simple to use, and packed with handy features. The free version is excellent, but extra options are available for a small fee.

Record your screen on iOS

Recording the screen on an iPhone or iPad is similarly straightforward. Tap 'Settings', followed by 'Control Center' and 'Customize Controls', then tap the green plus icon next to 'Screen Recording'.
Load the app you want to record, then swipe up from the bottom of the screen (or down from the top right if you're using an iPhone X or later, or iPad with iOS 12 or later. Tap the 'Record' button (a dot within a circle) and a three-second countdown will begin. Once this is over, the recording will begin.
To end the recording, tap the time indicator at the top left of the screen and select 'Stop'. Bear in mind that all notifications you receive while recording will also be captured.
  • Want to edit, trim, add effects and different video editing features to your recorded clips on Android? You'll need to check out Kinemaster Pro Mod Apk

Thank you for visiting my blog. Please leave us a comment below

Saturday, 20 July 2019

3 Awesome Ways to Crack WinRAR Password Protected Files

To open RAR file secured with a password, you need to have the password. However, if you do not have the password, you can restore the RAR file password and use it to open up the file. There are certain solutions to break RAR password using the control immediately, but they just work on integers and other mixtures of figures.

Method 1. Break RAR Password with Software

Have you ever ended up with RAR computer file that was security password protected? Maybe you set the security password yourself and didn't remember it! Whatever the case, there are a number of ways to break the security password on RAR computer file if you get fortunate. PassFab for RAR is an efficient RAR password breaker, which can help you to break RAR password on file's unidentified password or recover RAR file password when you didn't remember it.
This RAR password recovery tool will help you to get your RAR password in quick time. The more details you have, the less much time it will take to find the password. Just obtain the pathway and try to remove password from secured RAR archive all by yourself. The software is easy to use and secure, you will never lose to your personal RAR file when all operation is succeeded.
The information below demonstrates how to use PassFab for RAR detailed.
Step 1. Download this software from official site and install it on your Windows computer. When the installation is done, this program will be running.
Step 2. On "PassFab for RAR" main interface, hit "Add" button to import the encrypted RAR file.
rar password recovery
Step 3. Select an attack type for RAR password recovery from these three choices.
Select "Dictionary Attack" if you have a vocabulary that is a written text file record typical character mixtures, such as a, ab, 123, 4, AB, etc. that individuals may regularly use for secure passwords. Click "Settings" to use the standard vocabulary that comes with this system, or transfer your own one.
dicionary attack
Select "Brute-force with Mask Attack" if you can offer any hint about the neglected security password. Later just click "Settings" to determine the places such as Min Duration, Max Duration, Personality Set, etc. by yourself according to the possible signs about the security password you could keep in mind of.
brute force with mask setting
Select "Brute-force Attack" if you can't keep in mind anything about your security password at all. It will try all possible mixtures automatically, so no need to determine any establishing.
 brute force attack
Step 4. After specifying the attack type and setting, click "Start" to start recovery. Your password will be found in a pop up window.
 brute force attack

Method 2. Break RAR Password Online

This method is for you to decrypt RAR password on the Internet. All of the lost or forgotten security passwords can be retrieved successfully. Now you can remove or recover RAR file security password online without any software. Though this approach is for converting RAR file into a zip file, it also unlocks RAR file when it converts. So this is a simple method, let's see how it goes.
Step 1. First, go to the Online Zip converter.
search online compression tool
Step 2. Browse passwords protected RAR computer file for whom you want to remove security password.
Browse Protected RAR File
Step 3. Now click on convert file. It will first upload this computer file to its server and then turn into zip format and eliminate its security password.
Step 4. Now you can download this zip computer file without a security password.
RAR Password Discovery Online
Congratulations! Finally, you are successfully done with the removing the password from RAR file. This technique is interesting, the method to turn RAR file into Zip file is also removing security password.
Remove RAR Password Without Any Software

Method 3. Break RAR Password with CMD

If you forgot RAR password, how can you unrar that file? All you need is to apply 100% working technique that can break lost RAR password. In this section, you will be learning about how to break RAR file password using the Command Line(Command Prompt).
Step 1. Select and right-click the group computer file (command prompt).
Step 2. Just click Edit. You will be allowed to run this command line secure.
Step 3. Search down to the: UNLOCK part of written text computer file. A line of text will be shown, or "command/code" which will say: if NOT %pass%== [PASSWORD DISPLAYED HERE] go to fail.
Step 4. Now go back and run the group file. In the previous step, you acquired the security password to go into the "secret" directory. Use this security password to get through the security password system.
You have now gained access to the "secret" file or folder. Not many people know how to bypass such kind of security passwords unless they are technically smart.

Summary

Now you can simply start RAR file without a security password, or you can also draw it out. It's so simple! Now you can open any RAR file secured with password and check it's data or contents freely without any application. If you have a question about how to bypss RAR password or you don't succeed in eliminating RAR security password, then you can come here with your concerns, we will absolutely help you.

Wednesday, 29 May 2019

How To Fix A Water Damaged Phone In Simple Steps

Hi Guys, In today's article, I want to mention the first steps you take to help you save your phone from possible damages that arise from water harm. It may be early to recover your phone or too late depending on on long it stayed in the water and what you did after the accident.


There is possibility of fixing a phone that was removed from the water immediately the moment it fall into the water. I cannot guarantee that below steps will help save the phone from technical damage but it may be of a great help ensuring the water doesn't cause more damages and eventually get back to it is normal status after below steps. When you immediately remove the phone from the water, the follow steps should follow:

Step 1. Turn off the phone, if it isn't already and hold it upright.

Step 2. Remove any protective casing and, if your phone has them, remove your SIM and Micro SD cards from their slots.

Step 3. Open up the back and remove the battery, SIM card(s) and Micro SD card if you are able to (not that this won't be possible with all the models).

Step 4. Use a cloth, sleeve or paper towel to dab your phone dry. Avoid spreading the liquid around, because that could push it into more of the phone's openings.
Just soak up as much as possible

Step 5. If the water damage is more extensive, you can use a vacuum to carefully suck out water stuck from the cracks that are harder to get at.
Make sure any small parts, such as microSD card, SIM card, or battery, are out of the way before attempting this.

Step 6. Bury the phone in a ziplock bag full of uncooked rice. Rice is great for absorbing liquid and this is actually a common method for drying smartphones and tablets.
You can also buy dedicated phone drying pouches, which are worth having at home if you are the clumsy type.
If you don't have one at home, don't bother going out to buy one. Indeed, time is of essence, so get your phone into rice as soon as possible

Step 7. Let your phone dry for a day or two. Do not be tempted to switch it on to see if it still works. Put your SIM card in an old phone, or ask a friend or family if they have a spare that you can borrow.

Step 8. After a couple of days, you can remove the phone from the rice back, insert the battery into the phone and on the phone.

Step 9. If your phone does not turn, try charging it. If it doesn't charge, the battery may be damaged. You could try a replacement battery, or consider taking your phone to a repair shop to be checked by a professional.

Step 10. If your phone has turned on and it is running as it should, you should still keep a close eye on it for the next few days, to see if you notice anything out of the ordinary.
Play some audio file to check the speakers and ensure the touch screen still responds as it should.


What Not To Do


  • Do not turn it on
  • Do not press any buttons or keys
  • Do not shake, tap or bang the phone
  • Do not blow on it. This could send water into other internal parts of the phone that it hadn't already reached, causing more damage in the process.
  • Do not heat it up (that includes using a blow dryer or microwaving it).


Hope this article was helpful to you. Please feel free to make a comment and thank you for visiting my blog.

How To Recover Files From Corrupted USB Or Memory Card

Hello guys, Sometimes our storage devices like the USB and Memory cards become corrupted and unusable anymore. We may have stored significant information inside these devices and we wonder how to retrieve them back. Today in this article, I want us to learn how to get back all data and files on our corrupted or damaged storage devices. Are you ready? Let's start.


Requiremets


  1. The corrupted or damaged SD card/USB
  2. A laptop or pc
  3. A software called  M3 Data Recovery
Step 1. Download The M3 Data Recovery software on your pc. On the website, you can choose the free version for Windows


Step 2. Complete installation and run the software on the pc


Step 3. Now connect your Pen drive or Memory card to the Pc and click on Data Recovery Module


Step 4. Choose your pen drive or memory card and then click Next> to search your lost data. M3 Data Recovery will analyze every sector on the selected volume and then find the lost files.


Step 5. When the scan finishes, you will be to preview found files. Then select files you want to recover and save them. In my case above, there were no lost data found becuase contains only one file.

Hope the article was helpful. Thank you for visiting my blog and feel free to comment any issue in the comment box below.

Labels